Monthly Archives: September 2013

How to Install Perl Modules on Mac OS X in 4 Easy Steps

http://triopter.com/archive/how-to-install-perl-modules-on-mac-os-x-in-4-easy-steps/

You see, for the past couple of years, I’ve been a bit frustrated because OS X does not come with a whole lot of Perl modules pre-installed, and for all I googled, I couldn’t find an “idiot’s” guide for moderately-savvy-but-not-expert users like myself to install modules and dependencies on demand.

The only instructions I could find point to Fink, which basically installs modules in a path that isn’t included in the Perl @INC variable, meaning you have to manually specify the full path to the modules in every script — which is not a lot of fun if you’re developing on OS X and deploying on Red Hat, for instance.

Moreover, Fink doesn’t seem to make every module available, and it’s not very easy to determine which Fink package you need to install if you need a particular module.

So, with a script that called on several apparently unavailable modules, and a deadline looming, I finally decided to suck it up and figure out how to use CPAN to install them:
1) Make sure you have the Apple Developer Tools (XCode) installed.

These are on one of your install discs, or available as a huge but free download from the Apple Developer Connection [free registration required] or the Mac App Store. I thought I had them, but apparently when we upgraded that computer to Tiger, they went missing.

If you don’t have this stuff installed, your installation will fail with errors about unavailable commands.
1.5) Install Command Line Tools (Recent XCode versions only)

(Thank you to Tom Marchioro for informing me about this step.)

Older versions of XCode installed the command line tools (which are required to properly install CPAN modules) by default, but apparently newer ones do not. To check whether you have the command line tools already installed, run the following from the Terminal:

$ which make

This command checks the system for the “make” tool. If it spits out something like /usr/bin/make you’re golden and can skip ahead to Step 2. If you just get a new prompt and no output, you’ll need to install the tools:

Launch XCode and bring up the Preferences panel.
Click on the Downloads tab
Click to install the Command Line Tools

If you like, you can run which make again to confirm that everything’s installed correctly.
2) Configure CPAN.

$ sudo perl -MCPAN -e shell

perl> o conf init

This will prompt you for some settings. You can accept the defaults for almost everything (just hit “return”). The two things you must fill in are the path to make (which should be /usr/bin/make or the value returned when you run which make from the command line) and your choice of CPAN mirrors (which you actually choose don’t really matter, but it won’t let you finish until you select at least one). If you use a proxy or a very restrictive firewall, you may have to configure those settings as well.

If you skip Step 2, you may get errors about make being unavailable.
3) Upgrade CPAN

$ sudo perl -MCPAN -e ‘install Bundle::CPAN’

Don’t forget the sudo, or it’ll fail with permissions errors, probably when doing something relatively unimportant like installing man files.

This will spend a long time downloading, testing, and compiling various files and dependencies. Bear with it. It will prompt you a few times about dependencies. You probably want to enter “yes”. I agreed to everything it asked me, and everything turned out fine. YMMV of course. If everything installs properly, it’ll give you an “OK” at the end.
4) Install your modules. For each module….

$ sudo perl -MCPAN -e ‘install Bundle::Name’

or

$ sudo perl -MCPAN -e ‘install Module::Name’

This will install the module and its dependencies. Nice, eh? Again, don’t forget the sudo.

The first time you run this after upgrading CPAN, it may prompt you to configure again (see Step 2). If you accept its offer to try to configure itself automatically, it may just run through everything without a problem.

There are a couple of potential pitfalls with specific modules (such as the LWP::UserAgent / HEAD issue), but most have workarounds, and I haven’t run into anything that wasn’t easily recoverable.

And that’s it!

Did you find this useful? Is there anything I missed?
Configuring VNC Server on Linux

Configuring VNC Server on Linux

Firewall

Open port OEL 7 :

# firewall-cmd --zone=public --add-port=portnumber/tcp --permanent
#firewall-cmd --reload 


systemd

Install the VNC Server.

# yum install tigervnc-server

Create a new configuration file for each of the display numbers you want to enable. In the following case, I am setting up the display number “:3”. Notice how the display number is included in the configuration file name.

# cp /lib/systemd/system/vncserver@.service /lib/systemd/system/vncserver@:3.service

Edit the new configuration file, amending the user and startup arguments as necessary. An example of the changed lines is shown below. All other lines should be unmodified.

User=oracle
ExecStart=/usr/bin/vncserver %i -geometry 1280x1024
 The vncserver service unit file
#
# Quick HowTo:
# 1. Copy this file to /etc/systemd/system/vncserver@:.service
# 2. Edit root and vncserver parameters appropriately
#   ("runuser -l root -c /usr/bin/vncserver %i -arg1 -arg2")
# 3. Run `systemctl daemon-reload`
# 4. Run `systemctl enable vncserver@:.service`
#
# DO NOT RUN THIS SERVICE if your local area network is
# untrusted!  For a secure way of using VNC, you should
# limit connections to the local host and then tunnel from
# the machine you want to view VNC on (host A) to the machine
# whose VNC output you want to view (host B)
#
# [user@hostA ~]$ ssh -v -C -L 590N:localhost:590M hostB
#
# this will open a connection on port 590N of your hostA to hostB's port 590M
# (in fact, it ssh-connects to hostB and then connects to localhost (on hostB).
# See the ssh man page for details on port forwarding)
#
# You can then point a VNC client on hostA at vncdisplay N of localhost and with
# the help of ssh, you end up seeing what hostB makes available on port 590M
#
# Use "-nolisten tcp" to prevent X connections to your VNC server via TCP.
#
# Use "-localhost" to prevent remote VNC clients connecting except when
# doing so through a secure tunnel.  See the "-via" option in the
# `man vncviewer' manual page.


[Unit]
Description=Remote desktop service (VNC)
After=syslog.target network.target

[Service]
Type=simple
# Clean any existing files in /tmp/.X11-unix environment
ExecStartPre=/bin/sh -c '/usr/bin/vncserver -kill %i > /dev/null 2>&1 || :'
ExecStart=/sbin/runuser -l username  -c "/usr/bin/vncserver %i -geometry 1280x1024"
PIDFile=/home/root/.vnc/%H%i.pid
ExecStop=/bin/sh -c '/usr/bin/vncserver -kill %i > /dev/null 2>&1 || :'

[Install]
WantedBy=multi-user.target

Run the following command.

# systemctl daemon-reload

Set the VNC password for the user defined in the new configuration file.

# su - oracle
$ vncpasswd
Password:
Verify:
$ exit
logout
#

Enable the service for autostart and start the service.

# systemctl enable vncserver@:3.service
# systemctl start vncserver@:3.service

You should now be able to use a VNC viewer to connect to system using the display number and password defined.

Use the following commands to stop the service and disable autostart.

# systemctl stop vncserver@:3.service
# systemctl disable vncserver@:3.service

VNC Clients

Once your VNC server is configured, you can connect to it from any VNC server. On Linux this will often be TigerVNC, installed using the following command.

# yum install tigervnc

Connect to a VNC server using the following command.

# vncviewer machine-name:port

# vncviewer maggie.localdomain:3
# vncviewer 192.168.0.4:3
Fedora 18  gets an “Oh no. Something has gone wrong” message in the VNC Client when trying to connect.

This is bug 896648 in the Red Hat bugzilla. According to comment 15 you can fix it by:

  • Add -session optional pam_systemd.so to /etc/pam.d/runuser-l; the whole file should look like:
    auth            include         runuser
    session         optional        pam_keyinit.so force revoke
    -session        optional        pam_systemd.so
    session         include         runuser
    
  • Edit vncserver@:<display>.service
    • Change Type to simple
    • Add an -fg parameter to the vncserver command in ExecStart
    • Comment out the ExecStop line

Oracle 11g on Oracle Enterprise Linux

How I Simplified Oracle Database 12c and 11g Installations on Oracle Linux 6

by Ginny Henningsen; updated by Michele Casey

How to simplify the installation of Oracle Database 12c or 11g on Oracle Linux 6 by installing the oracle-rdbms-server-12cR1-preinstall or oracle-rdbms-server-11gR2-preinstall RPM package, which automatically performs a number of tasks, such as installing required software packages, resolving package dependencies, and modifying kernel parameters.

http://www.oracle.com/technetwork/articles/servers-storage-admin/ginnydbinstallonlinux-488779.html


As root perform pre-installation script that also creates user:group oracle:oinstall

# cd /etc/yum.repos.d
# wget http://public-yum.oracle.com/public-yum-ol6.repo
# vi public-yum-ol6.repo
# yum install oracle-rdbms-server-11gR2-preinstall
# cd /home
# mkdir OraDB11g
# chown oracle:oinstall OraDB11g
# cd OraDB11g
# unzip linux.x64_11gR2_database_1of2.zip
# unzip linux.x64_11gR2_database_2of2.zip
# yum -y install unixODBC-devel

As root activate user oracle by setting password

 
# passwd oracle

As root modify hosts file otherwise listener won’t work.

# vi /etc/hosts
host-ip  oraclehost.domain  oraclehost

Log in as the user oracle. Change directory to the database directory and enter the following command to run the Oracle Universal Installer:

# cd /home/OraDB11g/database
# ./runInstaller

no email
no security updates [Yes]
(*) database software only
(*) Single instance database installation
Language := English
(*) Enterprise Edition
Oracle base [/home/oracle/app/oracle]
Oracle home [/home/oracle/app/oracle/product/11.2.0/dbhome_1]
Oracle inventory [/home/oracle/app.oraInventory]
Oracle invetory groupname [oinstall]
OSDBA DBA Group [dba]
OSOPER Operator Group [oninstall]

Installer asks to run two installation scripts as root

[root@burung oracle]# /home/oracle/app/oraInventory/orainstRoot.sh
[root@burung oracle]# /home/oracle/app/oracle/product/11.2.0/dbhome_1/root.sh

Create user specific environment and startup programs

vi .bash_profile

PATH=$PATH:$HOME/bin:$HOME/app/oracle/product/11.2.0/dbhome_1/bin/
export PATH
export ORACLE_BASE=$HOME/app/oracle
export ORACLE_HOME=$HOME/app/oracle/product/11.2.0/dbhome_1

Start Oracle Listener

[oracle@burung ~]# lsnrctl start
[oracle@burung ~]# lsnrctl status

LSNRCTL for Linux: Version 11.2.0.1.0 - Production on 22-JUL-2013 14:36:53

Copyright (c) 1991, 2009, Oracle. All rights reserved.

Connecting to (ADDRESS=(PROTOCOL=tcp)(HOST=)(PORT=1521))
STATUS of the LISTENER
------------------------
Alias LISTENER
Version TNSLSNR for Linux: Version 11.2.0.1.0 - Production
Start Date 22-JUL-2013 14:36:33
Uptime 0 days 0 hr. 0 min. 20 sec
Trace Level off
Security ON: Local OS Authentication
SNMP OFF
Listener Log File /home/oracle/app/oracle/diag/tnslsnr/burung/listener/alert/log.xml
Listening Endpoints Summary...
(DESCRIPTION=(ADDRESS=(PROTOCOL=tcp)(HOST=burung.mcint.local)(PORT=1521)))
The listener supports no services
The command completed successfully

As user oracle create a database. You need to login oracle owned GUI/VNC session!!
(start GUI duurt lang voordat de GUI tevoorschijn komt)
(Follow Oracle for dummies)

# dbca

Now you can start sqlplus

# export ORACLE_SID=sid
# sqlplus / as sysdba

startup
..
..
shutdown

# lsnrctl stop LISTENER

Enterprise manager is at: https://localhost:1158/em, but nobody cares anyway.

# emctl start
...
..
# emctl stop

How to install Subversion on Fedora

http://www.if-not-true-then-false.com/2010/install-svn-subversion-server-on-fedora-centos-red-hat-rhel/

This is guide, howto install SVN (Subversion) server on Fedora 19/18/17/16/15/14, CentOS 6.4/6.3/6.2/6.1/6/5.9, Red Hat (RHEL) 6.4/6.3/6.2/6.1/6/5.9.

What is SVN (Subversion)?

Subversion is a free/open-source version control system. Subversion manages files and directories, and the changes made to them, over time. This allows you to recover older versions of your data, or examine the history of how your data changed. In this regard, many people think of a version control system as a sort of “time machine”.

Install SVN (Subversion) Server on Fedora 19/18/17/16/15/14, CentOS 6.4/6.3/6.2/6.1/6/5.9, Red Hat (RHEL) 6.4/6.3/6.2/6.1/6/5.9

1. Change root user

su -
## OR ##
sudo -i

2. Install needed packages (mod_dav_svn and subversion)

yum install mod_dav_svn subversion

Note: If you don’t have Apache installed already, this command installs it also. Read more about installing Apache and PHP >>

3. Modify Subversion config file /etc/httpd/conf.d/subversion.conf

Add following config to /etc/httpd/conf.d/subversion.conf file:

LoadModule dav_svn_module     modules/mod_dav_svn.so
LoadModule authz_svn_module   modules/mod_authz_svn.so

<Location /svn>
   DAV svn
   SVNParentPath /var/www/svn
   AuthType Basic
   AuthName "Subversion repositories"
   AuthUserFile /etc/svn-auth-users
   Require valid-user
</Location>

Read more SVN Access Control >>

4. Add SVN (Subversion) users

Use following command:

## Create testuser ##
htpasswd -cm /etc/svn-auth-users testuser
New password: 
Re-type new password: 
Adding password for user testuse
## Grant access to authorization file ##
chown -R apache:apache /etc/svn-auth-users

Note: Use exactly same file and path name as used on subversion.conf file. This example use /etc/svn-auth-users file.

Read more SVN Access Control >>

5. Create and configure SVN repository

mkdir /var/www/svn
cd /var/www/svn

svnadmin create testrepo
chown -R apache.apache testrepo

## If you have SELinux enabled (you can check it with "sestatus" command) ##
## then change SELinux security context with chcon command ##

chcon -R -t httpd_sys_content_t /var/www/svn/testrepo

## Following enables commits over http ##
chcon -R -t httpd_sys_rw_content_t /var/www/svn/testrepo


Restart Apache:

/etc/init.d/httpd restart
## OR ##
service httpd restart

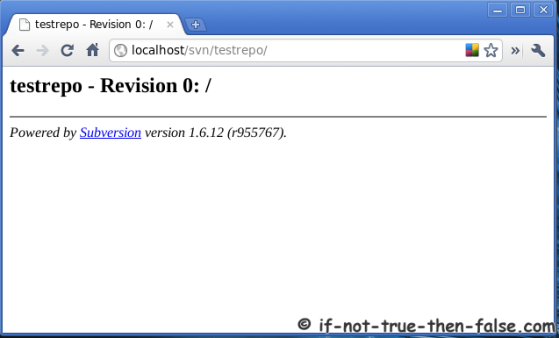
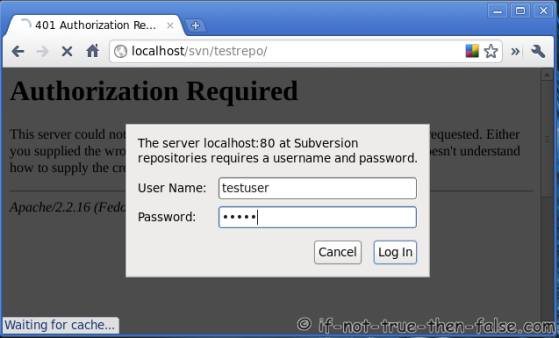
Goto http://localhost/svn/testrepo address and you should see something like following, write username and password:
SVN Subversion username and password

SVN testrepo revision 0:
SVN Subversion Repository Revision 0

6. Configure repository

To disable anonymous access and enable access control add following rows to testrepo/conf/svnserve.conf file:

## Disable anonymous access ##
anon-access = none

## Enable access control ##
authz-db = authz

7. Create trunk, branches and tags structure under testrepo

Create “template” directories with following command:

mkdir -p /tmp/svn-structure-template/{trunk,branches,tags}

Then import template to project repository using “svn import” command:

svn import -m 'Initial import' /tmp/svn-structure-template/ http://localhost/svn/testrepo/
Adding         /tmp/svn-structure-template/trunk
Adding         /tmp/svn-structure-template/branches
Adding         /tmp/svn-structure-template/tags

Committed revision 1.